Posts

Showing posts with the label re do

Scarfed up & (inspired) Upcycle Tee

Image
Yes, I know I need to invest in a few more scarves. I love this one though...perfect colors that go with a lot of my clothing... Anyway, here are 3 simple looks you can try with your scarf on your bad (or good) hair days... Also I was inspired by AndreasChoice recent upcycle old t shirt video to try a few things with my clothing. I bought this tee at KMart on sale. It was long sleeve and longer in length. I cut the sleeve and cropped the bottom, but that wasn't enough. I think it looks a little more 'fun' now!! I just love DIY projects Check out Andrea's Video I'm on tumblr :) Jayrcee.tumblr.com My Outfits & Hair vid Blessings J
DIY: 'Peace'

Image
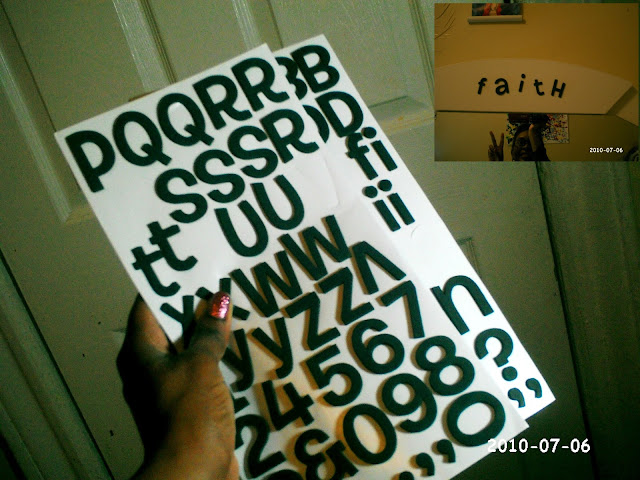
I had a little time on my hands the other day, so I decided to be creative. (apologies for the quality of pics. I used my new video cam. Key word 'video' J! smh Will know better for next time) I was inspired by this pack of letters I bought at Target earlier that day. 1. Draw out the letters  on regular printing paper. I used a permanent marker in black. 2. You can create a design if you want within the letters. I went with Zebra print for a couple letters...sort of  lol My colors of choice; black and pink. You use what's better for your decor 3. Apply glue on the back of each letter and stick it carefully onto glossy photo paper 4. When the glue dries, cut out the extra "parts" of the P, A ans Es. I used a box cutter. Be careful. I used a scissors to cut the rest. Then you're pretty much done! Glue/ stick letters any where you want :) Your room, kids room...Be creative. Have fun My latest styl...

DIY: Studded

Image
Got these for $3.99 (3/ $10) @ Pretty Girl! STEAL! (The sizes run small. I'm a size 8, but a 9 fit perfectly) They say 'Forever 21' on the inside..... Heard there are similar ones at H&M as well for around $10 each  1. Ok. I used the studs off of this old belt to create a pattern on these kicks You can find similar ones at a craft store 2. The studs are spiked at the back. I straighten them with the tip of a small scissors or my teeth (CAREFULLY) after I take them off the belt and placed em were I wanted them to be on the shoes. 3.   Be sure all 4 spikes go all the way through the fabric. I used the tip of the scissors to carefully clamp them down :) It took me about 2 hrs to complete I wanted to add studs on the inside as well, but ran out.  Gotta Love it! Get studding!! Blessings J *Rate this Post*

DIY/STYLE: Reconstruct Thrift Item

Image
Remember this arm-hole denim jacket thingy I got thrifting a few weeks back? Well, I reconstructed it to look like this... Might have to fix the right (your left) side a bit I cut and shaped the sides, used fabric glue to stick it back together and put studs on the pocket flaps :) I got the studs from an old belt. If you noticed, I did the design a bit different. Mainly because I got lazy :/  lol Don't forget to enter my Holiday Giveaway !! Cheerio! Blessings J

DIY/ Re Do: Spiced up my Heels :)

Image
~I used my glue gun ~  reinstones 2.99/pk fabric store I wore these once since I bought them last year. I hope I'll wear em more now! You like?? Follow & Share :) ~~How to Follow~~ 1.On Blog, upper right side where you scroll- drag mouse 2. 'My peoples' (2nd from top)- click it 3. Click 'Join site' SHOE SALE (sorry, not the best pics) ~~ Color even brighter in person- hot pink ~~ Size 7.5 BUT runs small (if you usually wear 6.5 it would fit you) ~~ $20 (includes shipping) ~~Never worn COMMENT if interested :) Blessings J

DIY/ Re Do: Stud my Jacket!!

Image
                                    So I bought this leggings about 2 years ago from Strawberry. The first time I wore it, it tore on me x_x. I did, however wear it twice after that o_O Also, the studs started falling off. Long story short, They're trash BUT I heart the studs on em AND didn't like how plain Jane my H&M jacket was, soooo... ~I used my glue gun ~I had to play around with a few ideas before I decided on this one ~ I also plan on changing the buttons to match the studs 'OUTFIT' post coming soon Random 1st Snow for the season Follow & Share :) ~~How to Follow~~ 1.On Blog, upper right side where you scroll- drag mouse 2. 'My peoples' (2nd from top)- click it 3. Click 'Follow site' Blessings J

SNAPSHOTS: Random

Image
Random Shmandom... 1. Painting my mirror again...It was first grey before I paint it gold, now black 2. Face before I stepped out 1st time with my twists lol 3. Cute star fish I got at the Goodwill 2.99 4. A/X Jacket from the Goodwill 14.99 (will show in future post) 5. Cute Bible that caught my eye at the Bell Tower bookstore downtown Brooklyn **UPDATE I posted a "Giveaway Winner" Post, but I seem to have lost it :/ Qochemist won the giveaway!!! I DID NOT do a "live" drawing because she and one other follower entered The other follower followed my blog AFTER I announced the giveaway, so she did not qualify. There will be another giveaway soon. Blessings J

RE-DO: From Bag to Clutch!

Image
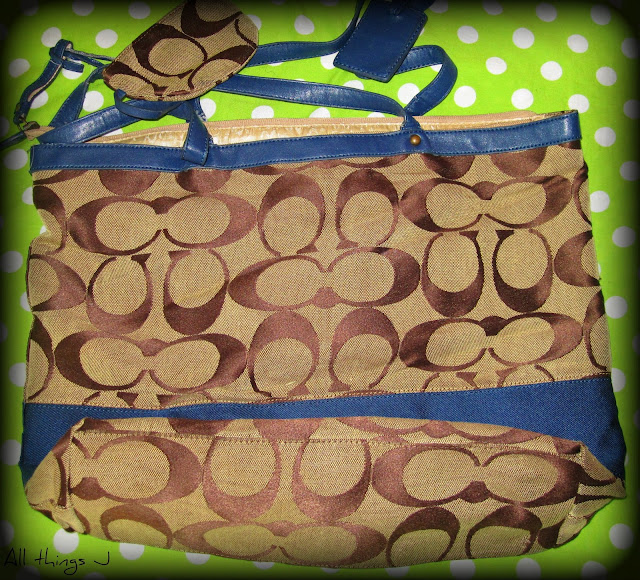
This idea just came to me while searching through my bags. This is not an Original Coach bag, calm down lol  The camera is doing it justice I tell ya The bag was old, dirty and I haven't used it in ages. Why not turn it into something that I would most definitely use?! A clutch! Lets go I carefully cut the bag up  This re-do would not be possible with out my mom. Here she is, hard at work!!  Measuring the flap- 3.5"  Steaming the edges down to get it flat and crisp! Ta Dah!!! Fasteners were added to clip the flap down Gorgeous!! Clutch, get ready to get beat!! (there was also more material left over to make another clutch!!) My mom is super talented. LOVE Her!!!! Please visit her BLOG If you like this post Share and come back for more Your encouragement keeps us Bloggers going :) Blessings J

RE DO: How I store my MAKEUP & (some) JEWELRY

Image
             I decided to do this post half way through the organizing process, hence only one before pic. I love to be neat and it gives me happy chills when I see things organized. o_O Drawer one: Before After I also stored some makeup under the tray Drawer two I don't collect makeup. When I buy new things (that I NEED), I get rid of the "old" stuff Ugh. Product from those eyeliners are everywhere :/ (more cleaning) Drawer three Organizer tray: 5.99 Target Three drawer Organizer: Target- width 14"    height 10.5" I lined inside the drawers with wax paper ~~Bangles, bracelets... ~~Everyday jewelry ~~Rings If you liked this post, please share on twitter, facebook etc :) Blessings J